
The great majority of my favorite landscape images have been taken at the wider end of the spectrum of focal lengths. Since moving to a technical camera a few years ago, my wide-angle lens of choice is the Rodenstock 32HR. It provides a field of view of roughly what a 21mm lens would provide using a 35mm format. If I need to create an even wider view, then I will use the shift feature available on my Cambo WRS and stitch accordingly.
But landscape photography doesn’t always live up close and low to your subject. Sometimes, I want to be able “extract” a small segment of a much broader landscape scene. The lenses generally designed for a technical camera, such as the Cambo WRS and others, are generally limited in their longer focal lengths. Those longer focal lengths generally are tapped out at 180mm. Because of this limitation, I was interested in finding a way to utilize legacy medium format telephoto lenses (with large image circles) that were originally designed for film use. This way, I could extract small segments of a landscape scene while still utilizing the full size of the Phase One 645 IQ280 sensor.
The first step was determining if it was possible to find an adaptor that could connect a legacy MF lens to the WRS. I was able to find a third party on eBay that custom makes such an adapter, but it is limited to Hasselblad V lenses. This adapter is in small quantities (there was only one, in fact, that was available at the time!), so I gobbled it up just so that I would have it for testing purposes.

Cambo WDS WRS Lens board for Hasselblad lens)
The second step was deciding on a focal length. I already have a Rodenstock 180mm HR in my kit. A 250mm lens was not enough of an increase in focal length reach. My thought would be to look closer to the 350mm range. I narrowed it down quickly to the Hasselblad 350mm.
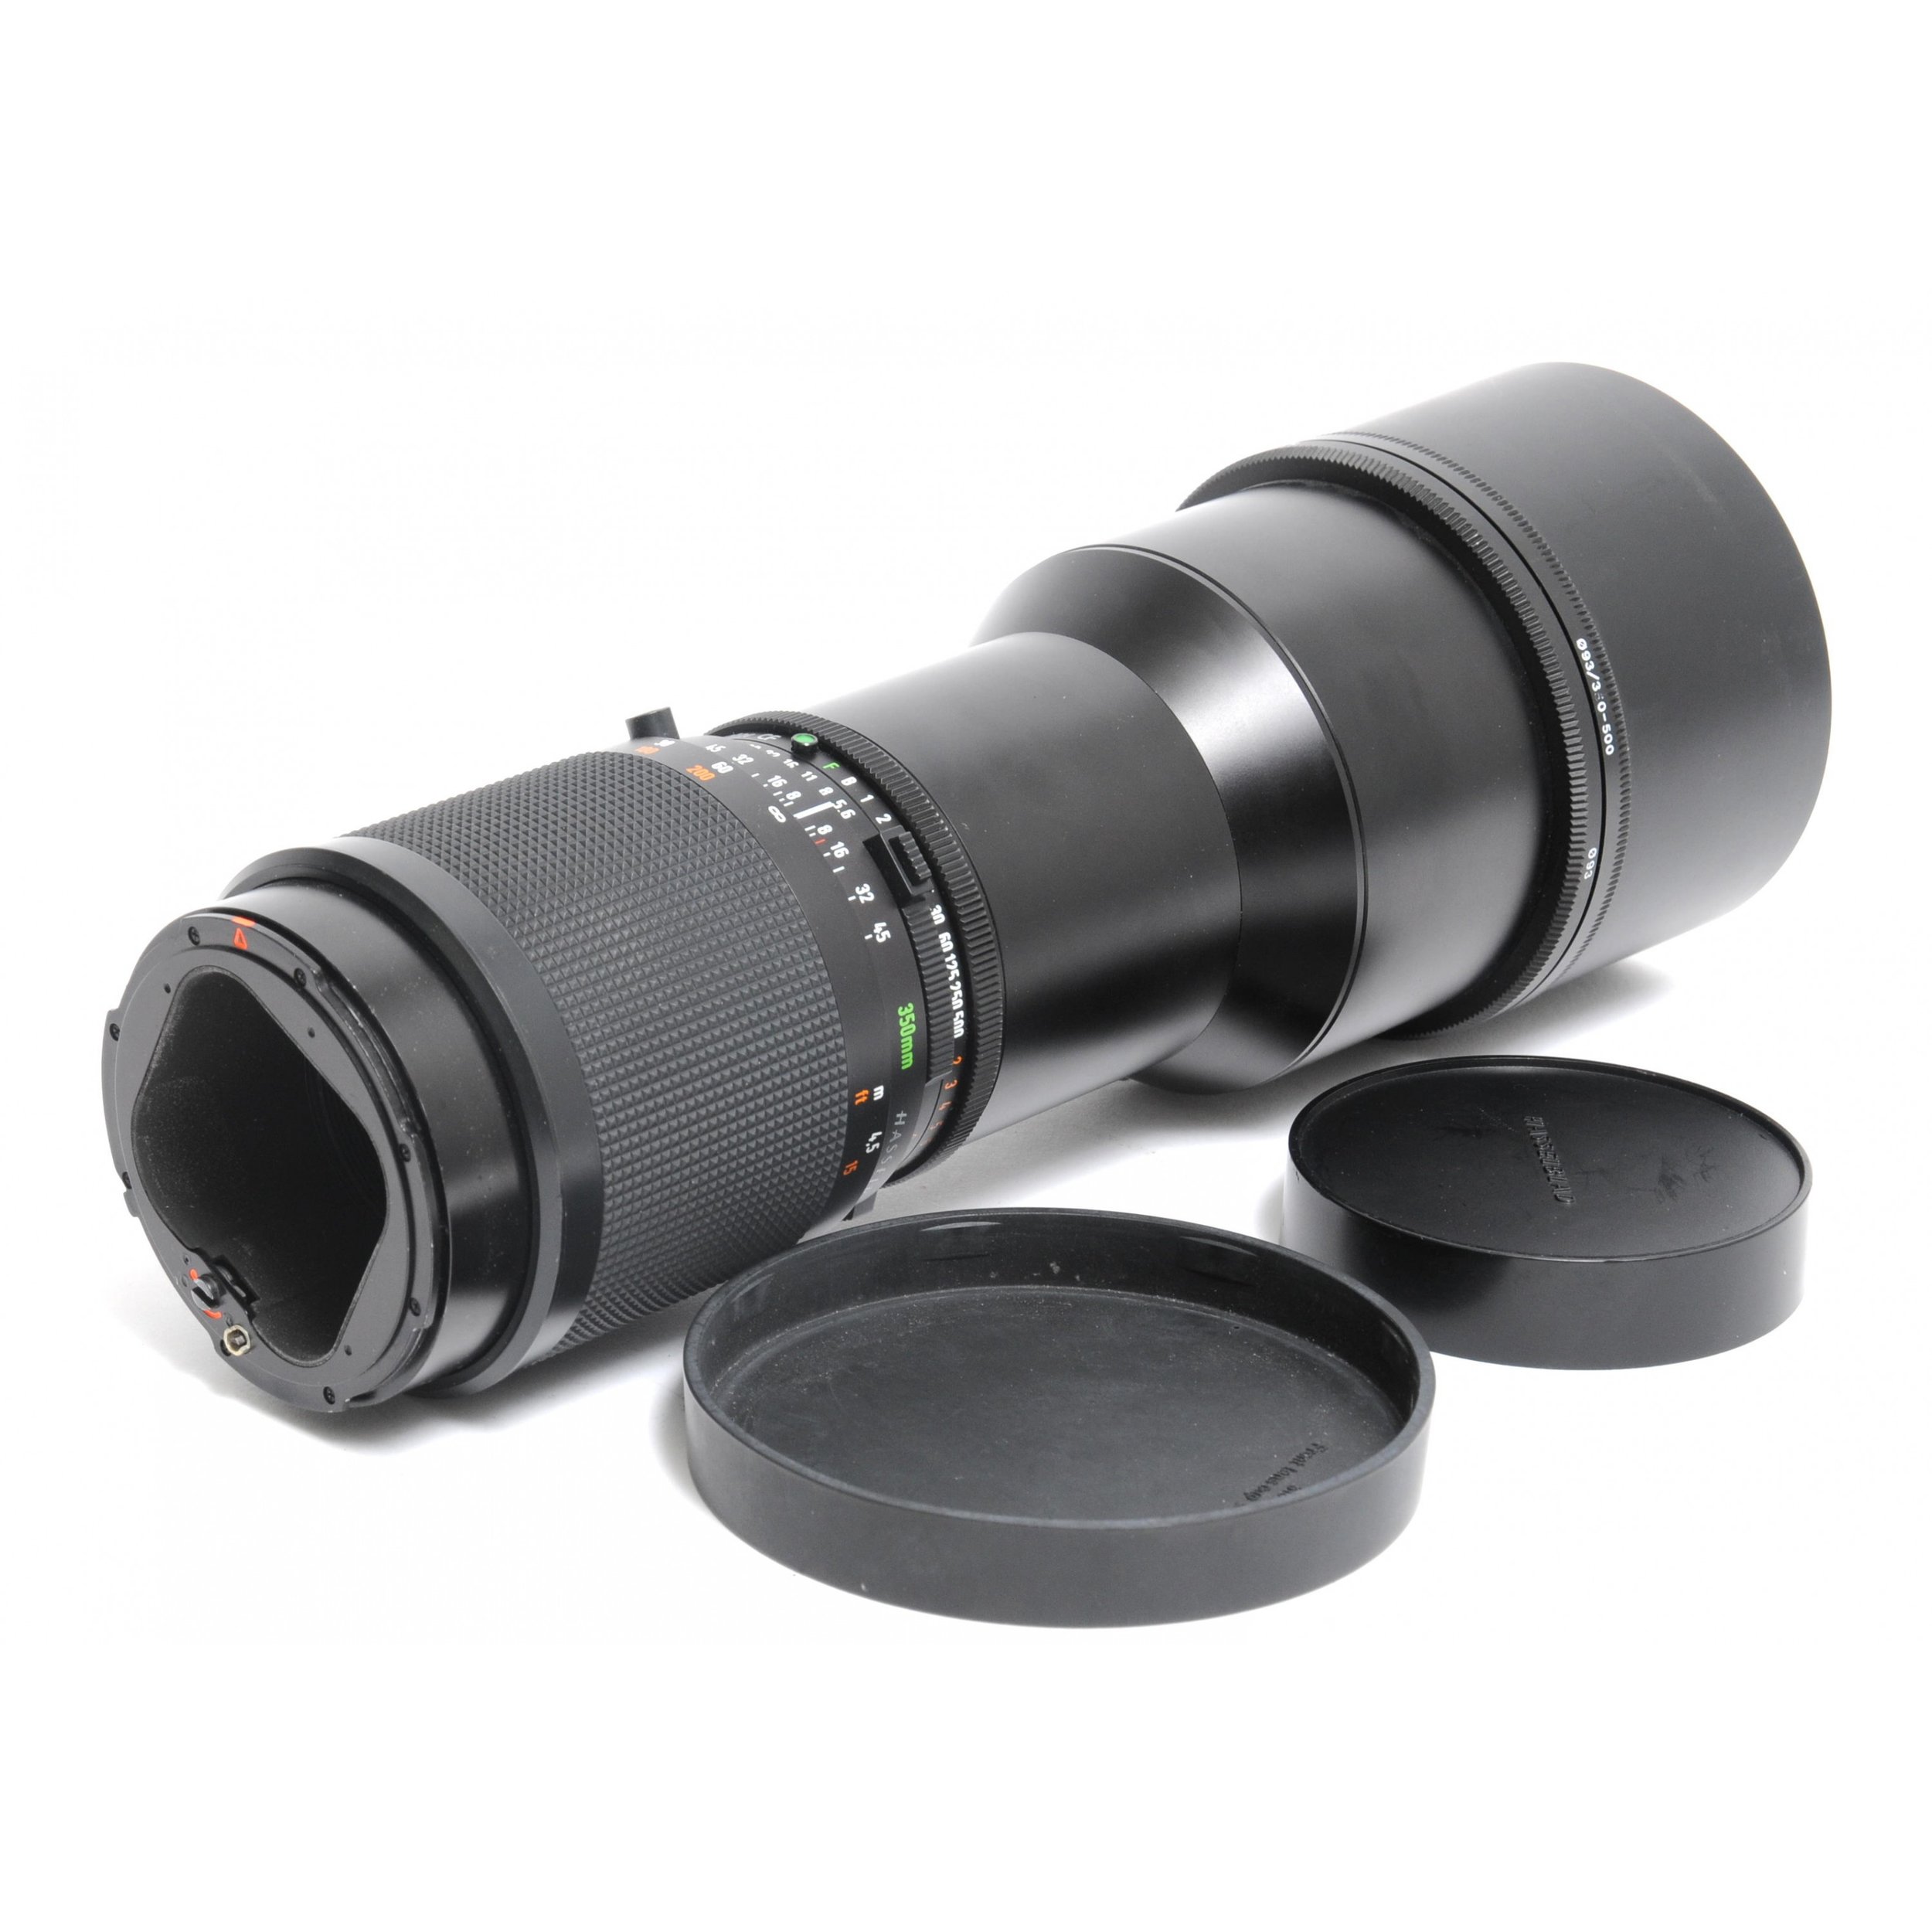
Hasselblad 350mm CF T*
There are generally two versions of this lens, of note, that are available on the secondary market. The CF T* version and the Superachromatic (SA) version. During the film age (that sounds so long ago), the CF was considered an exceptional lens, until the SA came along. The SA lens is known to be in a class of its own. One potential issue between the two is that the SA is 7-10X the cost of the CF version and good copies could run $8,000-$10,000. The question for me was whether the superior quality of the SA was worth the extra cost for something that I would use significantly less than 10% (or less) of the time.
I decided to take a chance and looked at the CF version first. It is a fully manual lens with aperture control and shutter built into the lens. I was able to secure a copy that cosmetically looks perfect and mechanically/optically looks equally as good. The third-party adapter connection to the Cambo WRS is excellent and operationally it is very easy to use. Once the adapter is connected to the lens, it requires activating the shutter with a knob, depressing the shutter release once to close the shutter, using a wakeup cable on the digital back, and then depressing the shutter release a second time to make the exposure. It takes a lot more time to write it out than to do it. The whole process is about 3 seconds.
I performed two tests. One test was indoors where I photographed a plaque from a distance of about 22 feet. At that distance, given the 350mm focal length, even shooting at f11 the depth of field is very thin. Unlike my Schneider and Rodenstock lenses, I did not try to rely on the depth of field scale located on the barrel of the lens (although it seems pretty accurate). Rather, I tried to focus using the Live View on the IQ280. Let’s just say, that while it is doable, it is far from an exact science due to the failings (i.e. slow refresh rate) of the CCD. It is focus, shoot and hope you got it right. Below are images of behind the scenes of the test, the resulting full-size image and then a 100% crop. Since the lens is not designed for a digital sensor I thought it only right to apply some default capture sharpening in Capture One and then a little bit of high pass sharpening in Photoshop. When you look at the 100% crop, I think the CF is able to extract some pretty small details using the IQ280. I would be interested in what you think. Note that the 100% crop is only about 1,300 pixels across so do not look at it bigger than its actual size.

Behind the scene. Yes, that is Arnold Palmer giving a wave!
Image as taken.

100% Crop. FYI, the titles are about 1/16 of an inch high and shot from 22 feet away. Yes, I haven't played Merion, yet.
The second test was to take the “beast” (with long lens adapter, etc. it weighs just under 5 pounds) outside and see how well it would do focusing on something close to infinity. I went to a nearby reservoir. See below for the behind the scene images. Also below is the full image with a highlighted section showing a portion of the image which is a 100% crop. A few thoughts. Since I knew that I was shooting something that was almost a half mile away I was confident that I was well beyond the hyperfocal distance shooting at f11. To focus, I just racked the lens to the infinity mark and took a shot. Here is what I found. In a high contrast scene such as what I shot (bright sky and dark trees), there was some chromatic aberration on the edges of the trees around the perimeter of the image. This was only mildly cleaned up by Capture One, but was almost totally cleaned up by Photoshop’s raw processor. The full-size image, after applying some capture sharpening and high pass sharpening looks pretty good on my dual 24” monitors. The 100% crop, given that the subject is ½ mile away, has surprisingly good detail to it.

Behind the scene.

A closer look behind the scene.
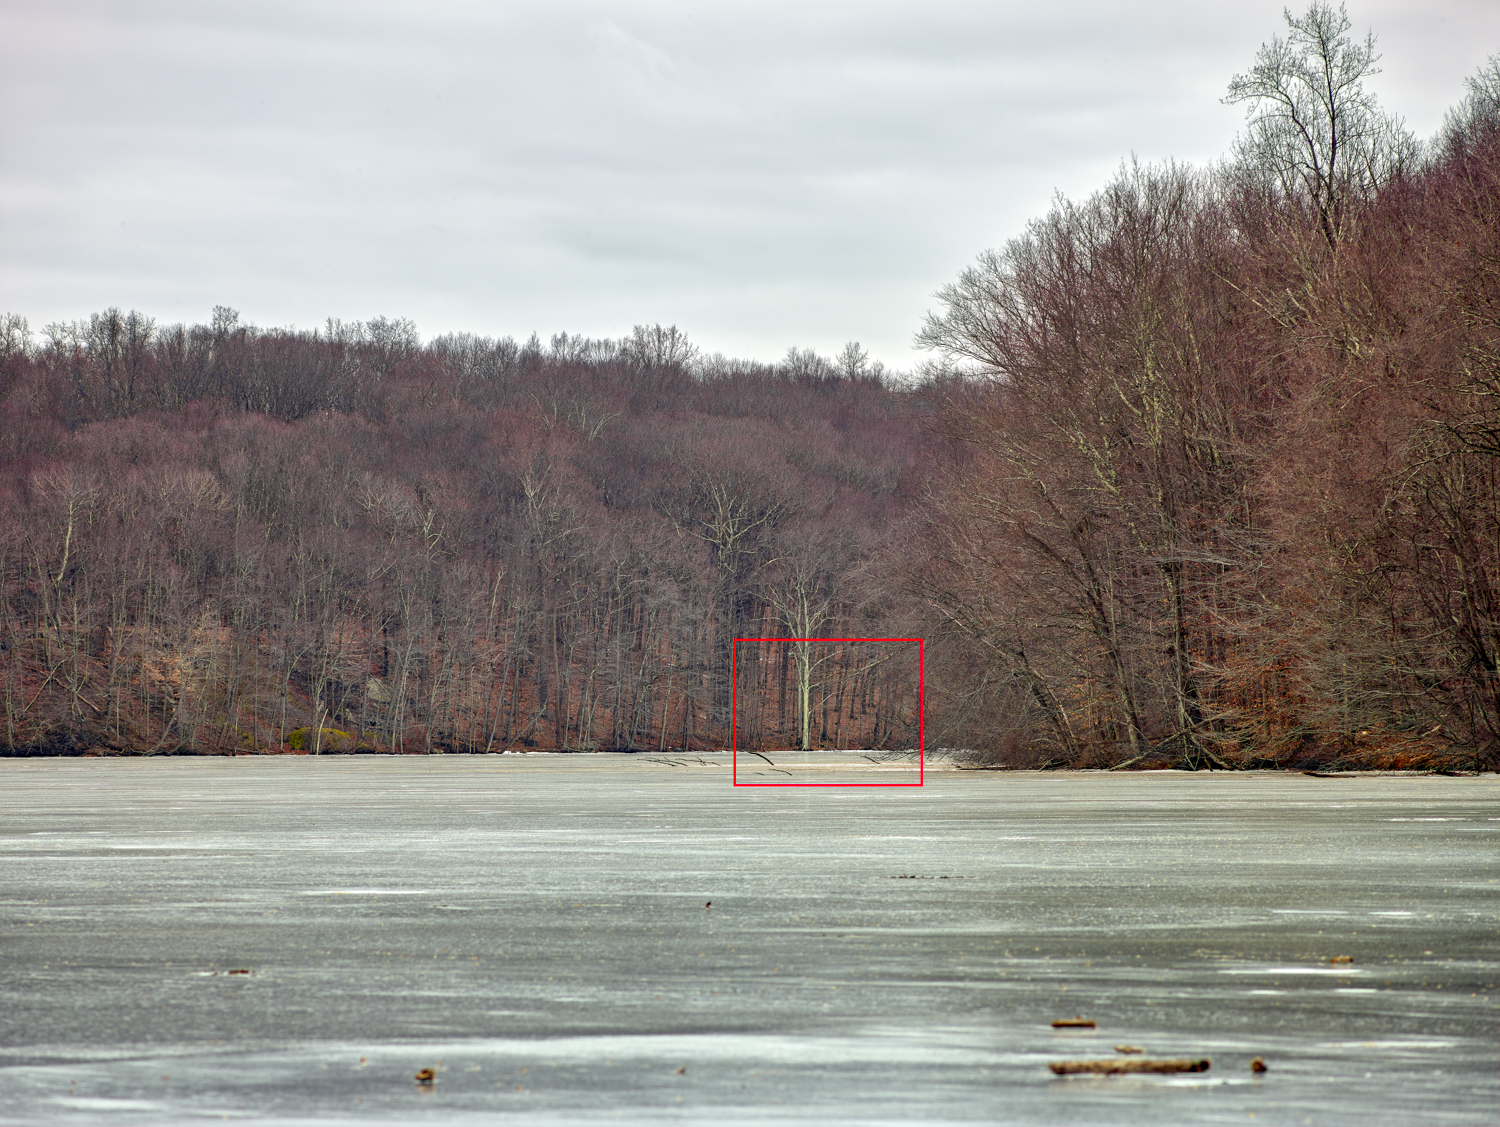
Image as taken. Red highlight indicates cropped area.

100% crop. This is almost 1/2 mile away!
I did a full-size test print of the landscape image. I printed it at its native size of roughly 40 inches wide. What is amazing is that it looks even sharper on the print than it does on my screen! I used no print sharpening. It also definitely looks different than prints from my Schneider and Rodenstock lenses. Sometimes my prints from theses lenses almost look too sharp! The print using the CF lens looks a bit more “old school.”
Final thoughts:
Out in the field, if you needed to focus on something other than at infinity, it is very difficult (albeit doable), at least on the CCD. A CMOS sensor may offer a better alternative, clearly, but that is not in my tool box right now. Maybe a ground glass option would make focusing at mid distance items easier, but the ground glass would present other problems in the field (wind, dust, speed of dwindling light, etc.). Still, it might be a worthy option to consider and test. Making sure that the lens is solidly secured to the tripod is essential. Just the slightest breeze is the difference between a sharp image and one that is soft. I used a long lens support system as seen in the behind the scenes shots above. I have since acquired a specific tripod lens mount, designed for the Hasselblad 350mm CF, which goes around the lens barrel and puts the weight of the lens directly over the center of the tripod. See below. I find this to be an even more stable solution than the long lens support system used in my field tests. It goes without saying, but I will, at slower shutter speeds, even if on a tripod, you need to be meticulous in the handling of the lens so there is no shake.

Hasselblad 350mm CF T*, Custom Cambo/Hasselblad V Adaptor and dedicated Lens Tripod Mount.
My initial takeaway is that the Hasselblad 350mm CF T* lens, when adapted to the Cambo WRS and Phase One IQ280, provides remarkably good results. I think it holds up very well to making prints at least at the native resolution of the sensor. I will make some additional test prints that are 50% larger than native and see how they look. In addition, based on some preliminary testing, it also appears that there is a large enough image circle that will allow about 10-12mm in each direction for shift and rise/fall. The lens does have some chromatic aberration in certain light that appears to be easily fixed in post processing. Is it the sharpest lens in the tool box? No. Do I think spending an additional $7-$10,000 for the SA lens will make a dramatic, and noticeable, difference in the end product (which, for me, is the final print)? No, I don’t. For those that see everything at pixel levels, it might make a difference, but that is not the world I live in. What matters to me is the final print. Obviously, each person’s expectations and own experiences will vary. The problem is that our 21st Century expectations are now quite different from what our 20th Century expectations were. In conclusion, I believe that the combination of the custom Cambo/Hasselblad adapter and the Hasselblad 350mm CF T* lens is an affordable option for people with the Cambo WRS, or similar, technical camera who are looking for longer telephoto focal lengths. Be aware, however, that working with a long lens and a CCD digital back definitely requires a greater, and more disciplined, effort in getting sharp images. The newer CMOS digital backs, with their improved Live View, would almost certainly make the experience far easier. Regardless, I believe that in certain situations (for example, my upcoming workshop to The Palouse), this will work out very well. We’ll just have to see!
Let me know if you have any questions.
Andy